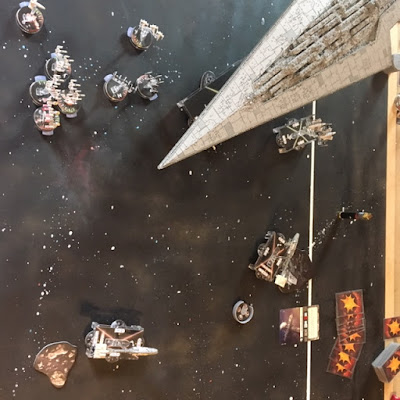
I went first and chose Station assault, and he placed them at either corner of the battlefield. He shoved his obstacles in the corners, while I shoved my two in the middle. I deployed along a wide front, with the idea of forcing him to choose a direction to turn his SSD after he placed it in the middle.
This ended up being a relatively boring game, as my plan was to essentially avoid the SSD and take out the stations instead. Meanwhile, with just the SSD, Gozanti, and Gozanti, Hubert didn't have a whole lot of capability to chase me down if I chose to avoid him.
Turn 1 was nothing but maneuvering, and the action didn't kick off until turn 2.
I forgot that the Assault Prototype had red flak, and essentially my whole squadron ball is in red flak range. Basically all of them ended up taking a hit. for his part, Hubert ran over an asteroid and pulled possibly the worst crit he could have found:
Fortunately for him I had little in front of his ship so it ended up mattering little.
The squadron battle went very poorly for Hubert, and he ran over Howlrunner sending her to the back of the SSD. My fighters had cleaned up his 5 TIEs by the bottom of round 3 and started attacking the SSD itself. But all this time he was flakking my squadrons.
On the right side, the LTT Nebs were doing an admirable job taking down the outpost while staying out of range of the SSD. The same could not be said for my signature speed 3 Liberty on the other flank, which was not doing nearly the same level of damage to its outpost and had to decelerate to get enough shots in before heading for the rear of the SSD.
I basically realized at this point that attacking the SSD further was pointless, and I might as well keep my low health squadrons alive. However, it was already too late for many of them to escape, as they could not get out of red range in a turn. Hubert picked off Biggs and Dutch with red dice hits as they fled, while Howlrunner re-entered the fray and nailed Jan right as she was about to escape.
My biggest mistake, however, came on turn 4. If you look above, you can see a Neb to the left of the SSD. It's currently in a single arc at red range. I should have gone with basically anything else first and not risked ending somewhere I didn't want to be, but instead I chose to go with it and wandered into a medium-range double-arc.
RIP.
With all my squadrons and the Nebs gone to both stations and the TIEs for Hubert, Hubert was set to win a 6-5 with 132-120. Here's how things stood as it ended:
A close game that showed off many of the strengths and weaknesses of the SSD.
Hubert and I could not decide if Station Assault was a good objective or not for his fleet. To Hubert's credit, it did distract my Liberty, keeping it out of the fight for most of the game and drawing the attention of my guns elsewhere. On the other hand, its easy to imagine a re-run of this game where I was smarter moving my Neb and didn't commit my squadrons to flak range, scoring a 100-40ish victory off the two stations for 7-4 tournament points. Hard to say for sure.
For my part, I was pretty happy with how my fleet played, and very happy with Garm plus ASTs. The LTT Nebs also punched far over their weight in what I hope will not be a fluke performance. However, I am concerned that this list doesn't have enough tools to deal with SSDs, which may be all that matters right now.
HTT was not as debilitating as I though, as I didn't realize that it's effect only took hold if you attempted to use more than one defense token. With this in mind, it's effects were not as bad as I thought they might be.
At any rate, I had been looking forward to this game for months. Congratulations to Hubert for the win in his inaugural game with the SSD!


No comments:
Post a Comment